
In our previous Google Tag Manager: A Beginner’s Guide post, we covered the basics of Google’s code-snippet (tag) management software, what it is, how to install it, and how to install Google Analytics using it. In this post, we’ll be looking at one of Tag Manager’s most useful features: Event Tracking.
Contents
What Are Your Users Doing?
In one of my previous posts from February 2017, I described how event tracking using Google Analytics is one of digital marketing’s underused gems, and how many businesses could benefit from implemented it on their website.
While traditional event tracking installation tends to be harder to do (manually inserting code), Google Tag Manager makes a breeze of it, allowing you to quickly and easily set up a powerful on-site interaction data gathering system that can help you make wiser, more informed choices online.
What we’re going to do in Tag Manager is set it up so that it tracks all of the following:
- Email link (mailto) clicks
- External link clicks
- Form submissions (e.g. contact form)
- Phone number link (tel) clicks
- Resource downloads (e.g. PDF files, CSV files, etc)
So, let’s see how it’s done:
Part 1: The Variables
For this example, we’re going to set up a tag and trigger so that when someone clicks an email link (mailto), Tag Manager sends the following information to Google Analytics:
- Event Category: Email
- Event Action: Click
- Event Label: {{Click URL}} – {{Click Text}} (e.g. ‘info@example.com – Email Us’)
First, we need to tell Tag Manager what type of interaction to list for, and to do this we need to define some ‘variables’.
Defining variables is easy: Simply navigate to your website’s Tag Manager workspace, click the ‘Variables’ link on the left-hand menu, then click the ‘CONFIGURE’ button:
![]()
Once the new pane has loaded up, scroll down and check the boxes for all the ‘Clicks’ and ‘Forms’ variables. These will, essentially, tell Tag Manager to ‘listen’ for these types of interactions:
![]()
When you’ve done that, click the X to close the pane and move on to the next step:
Part 2: The Trigger
Now we need to set up the listening part of the process. This essentially ‘listens’ for something specific to happen on your website before it sends certain information to a program (in this case, when an email link is clicked, Event Tracking information will be sent to Google Analytics).
To do this, first, navigate to the ‘Overview’ tab and click the ‘New Tag’ link we clicked when we installed Google Analytics. Then, once the pan has loaded, click the ‘Triggering’ box:
![]()
Once the pane has loaded, click the + in the top right-hand corner to add a new trigger:
![]()
When the new pane has loaded, click the ‘Trigger Configuration’ box. This will load a new pane (think Google likes panes by any chance?):
![]()
Once this new-new pane has loaded (titled ‘Choose trigger type’), click the ‘Just Links’ option under ‘Click’:
![]()
Now that we’ve told Tag Manager to listen for links, we need to define what links we want it to listen for in order to send information to Analytics. To do this, click the ‘Some Link Clicks’ button – from here we can define what links exactly to listen for. To set it up to listen for email links, what we want to do is set it up like the following: ‘Click URL‘, ‘starts with‘, ‘mailto:‘:
![]()
Once you’ve done this, click the ‘SAVE’ button and name your tag (I like to name it ‘Email – Click’), and click the next ‘SAVE’ button:
![]()
We’ve just created our first trigger! Now Tag Manager is listening for any clicks on links starting with ‘mailto:’. What we need to do now is tell Tag Manager to send this information along with an Event Label over to Google Analytics. So, click on your new trigger to add it to your tag and move onto:
Part 3: The Tag
Now, click the ‘Tag Configuration’ box:
![]()
When the ‘Choose tag type’ pane has loaded, click ‘Universal Analytics’:
![]()
Just like when we first set up Google Analytics, you will need to enter your website’s Google Analyitcs tracking ID. This time, however, instead what we’re going to do is change the dropdown below from ‘Pageview’ to ‘Event’. This will load some boxes below labelled ‘Event Tracking Parameters’. Here, do the following:
- Under ‘Category’ enter: ‘Email‘
- Under ‘Action’ enter: ‘Click‘
![]()
Once you’ve filled in these two boxes, what we’re going to do is set up the ‘Label’ box so that it sends custom information based on what the user has clicked. The best way to structure is like so: {{Click URL}} – {{Click Text}} (e.g. ‘info@example.com – Email Us’).
To do this, click the grey button to the right of the box. This will open a new pane:
![]()
In this new pane, select ‘Click URL’. This will add {{Click URL}} to the label box. Once that has been added, click the grey button again, this time selecting ‘Click Text’ when the pane has loaded. This will add {{Click Text}} to the box. Now just add a space, a ‘-‘, and another space between the two variables so that it looks like the following: {{Click URL}} – {{Click Text}}
![]()
Once this is done, click the ‘SAVE’ button, name your Tag (I like to call it the same as the trigger to avoid confusion: ‘Email – Click’), and click the ‘SAVE’ button.
![]()
Part 4: The Check
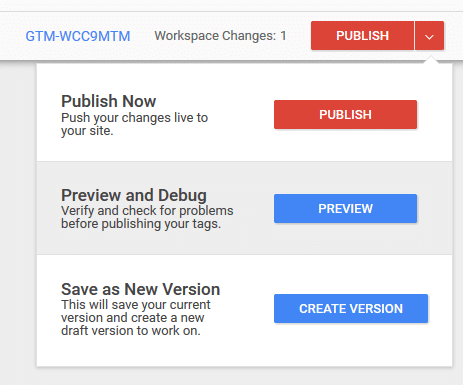
Just as we check that our Google Analytics installation was working, click the ‘PREVIEW’ button in the dropdown menu in the top right-hand corner, then navigate to your website:
This time, find an email link and click it. If the tag has worked, you should see it pop up as ‘Tags Fired On This Page’:
![]()
If this has worked, congrats! If not, please go through each of the steps and double-check everything.
Part 5: The Rest
Now that we’ve set up the email link tracking tag, we want to repeat the process for the rest our list with the following alterations:
Phone number click (Phone – Click)
Trigger
- ‘Click URL’, ‘starts with’, ‘tel:’
Tag
- Category: ‘Phone’
- Action: ‘Click’
- Label: {{Click URL}} – {{Click Text}}
External link clicks (Link – Click)
Trigger
- ‘Click URL’, ‘does not start with’, <your domain name including http/https> (e.g. https://socialb.co.uk)
- ‘Click URL’, ‘starts with’, ‘http’
Tag
- Category: ‘Link’
- Action: ‘Click’
- Label: {{Click URL}} – {{Click Text}}
Resource Downloads (Resource – Download)
Trigger
- ‘Click URL’, ‘contains’, <your domain name plus downloads area> (e.g. socialb.co.uk/wp-content/uploads/)
Tag
- Category: ‘Resource’
- Action: ‘Download’
- Label: {{Click URL}} – {{Click Text}}
Form submissions (Form – Submit)
Trigger
Instead of clicking ‘Just Links’, this time click ‘Form Submission’ and leave it on ‘All Forms’.
Tag
- Category: ‘Form’
- Action: ‘Submit’
- Label: {{Form ID}}
Conclusion
So there it is; one of the easiest ways of setting up one of Google Tag Manager’s most useful features. You can find all of this event tracking data in the ‘Behavior > Events’ report in your website’s Google Analytics view.
If you have any questions, please feel free to get in touch.


1 comment
Wow that was odd. I just wrote an incredibly long comment but after I clicked submit
my comment didn’t show up. Grrrr… well I’m
not writing all that over again. Anyhow, just wanted to say wonderful
blog!